


Having clean and safe water in your home is essential for various daily activities like cooking, bathing, cleaning, and laundry. A whole house water filter system can greatly improve the quality of the water throughout your house by eliminating contaminants and impurities. If you’re interested in reducing costs and taking complete control of your water filtration, a DIY whole house water filter system may be the ideal solution for you.
Before you begin, it’s crucial to have your water tested to understand what contaminants need to be removed. This knowledge will help you choose the right filter types and design a personalized system tailored to your specific needs. Building a DIY whole house water filter system not only saves money over purchasing expensive commercial models but also provides you with an intimate understanding of how the system works.
As you embark on this DIY journey, explore the various tools, materials, and steps required to create an efficient, budget-friendly, and customized whole house water filter. By investing your time and effort in this project, you can ensure that you and your family have access to clean, filtered water throughout your entire home.
Understanding Whole House Water Filters
Whole house water filters, also known as point-of-entry (POE) water filters, are designed to treat all the water entering a home, ensuring filtered water is available from every plumbing fixture. These filtration systems target contaminants and impurities, enhancing water quality for drinking, bathing, cooking, and more.
Types of Whole House Water Filters
There are several types of whole house water filters, and selecting the right one depends on your specific water source and the contaminants present. Some common types include:
- Sediment Filters: These filters remove larger particles like sand, silt, and rust. They are typically the first line of defense in a whole house water filtration system.
- Carbon Filters: Activated carbon filters are effective in removing chlorine, volatile organic compounds (VOCs), and improving taste and odor. They generally follow sediment filters in a system.
- Reverse Osmosis (RO) Systems: RO filters use a semipermeable membrane to remove a broad range of contaminants, including heavy metals, fluoride, and certain bacteria. However, they are not typically installed as whole house filters, but rather under the sink for point-of-use (POU) applications.
Contaminants Targeted by Water Filters
Whole house water filters can remove a variety of contaminants from your water supply. The specific contaminants targeted depend on the types of filters used in your system. Here are some common contaminants and the filters that effectively target them:
| Contaminant | Filter Type |
|---|---|
| Sand, silt, rust | Sediment filter |
| Chlorine, VOCs, taste, and odor | Carbon filter |
| Heavy metals, fluoride, bacteria | Reverse Osmosis |
To ensure optimal filtration, it’s essential to have your water tested before installing a whole house water filter system. This way, you can determine which contaminants are present and choose the best combination of filters to address them.
Planning Your DIY Water Filter Project
Assessing Your Water Quality
Before starting your DIY water filter project, it’s crucial to determine the quality of your water source. Water can come from different sources like tap water, well water, or city water. Getting your water tested will allow you to identify specific contaminants and make an informed decision about what kind of filter system you need.
Some options for testing your water include using home test kits or opting for professional water testing services like Tap Score. A comprehensive water test will reveal contaminants and their concentration levels, helping you choose the most suitable filtration system.
Choosing the Right Filter System
Based on the results of your water test, you can now decide which filter system best suits your needs. Consider the following factors when selecting your DIY whole house water filter system:
- Contaminant removal: Different filters have specific capabilities for removing contaminants. For example, activated carbon filters can effectively remove chlorine, sediment, and volatile organic compounds (VOCs). On the other hand, reverse osmosis filters can handle a more extensive range of contaminants, including heavy metals and certain bacteria.
- Flow rate: Ensure that the filter system you choose can handle the water flow rate of your household. A higher flow rate means faster filtration, translating to less frequent filter changes due to delayed clogging.
- Filter size: For a whole house water filter, a size 3 or 4 is usually ideal, depending on the number of family members and their water usage patterns. The bigger the filter housing and cartridge, the faster the filtration.
As you plan your DIY water filter project, remember to prioritize your family’s safety and health. Select a filtration system that effectively removes the contaminants specific to your water supply without making exaggerated or false claims. By investing the time and effort into understanding your water quality and filter options, you can enjoy cleaner, safer, and better-tasting water throughout your home.
Gathering Supplies and Tools
Before starting your DIY whole house water filter project, it’s essential to gather all the necessary supplies and tools. This section will guide you through the items needed, divided into three sub-sections: Filter Components, Plumbing Supplies, and Hardware and Tools.
Filter Components
The primary elements of a whole house water filter system are the filter housing and the filter cartridges that go inside. You will need:
- Filter housing: This holds the filter cartridges and is typically made of sturdy materials like stainless steel or plastic.
- Carbon filter: The carbon filter is an essential part of the system, removing contaminants and improving taste and odor. Choose a granular activated carbon (GAC) filter with a 20-micron pore size.
- Filter media: The media, such as activated carbon, removes contaminants from the water as it passes through the cartridge.
Plumbing Supplies
To integrate the whole house water filter system into your home’s plumbing, you will need the following supplies:
- Pipe fittings: Connect your filter system to your existing water supply with fittings such as elbows and tees.
- Section of pipe: Ensure you have a suitable length of pipe to connect the filter system to your home’s water supply.
- Shut-off valves and bypass valves: These valves allow you to control the flow of water through the system and make maintenance easier.
- Pressure gauges: Install gauges on both sides of the filter system to monitor water pressure and determine if and when the system needs maintenance.
- Connectors: These are crucial for making secure connections between your water supply, filter system, and household plumbing.
Hardware and Tools
Finally, you will need various hardware and tools to assemble and install the whole house water filter system:
- Pipe cutter: A must-have tool for cutting the pipe to the desired length.
- Teflon tape: Apply it to pipe threads to ensure a leak-proof seal between connections.
- Screwdriver: Useful for tightening screws and installing mounting brackets.
- Solder and torch (if necessary): Some connections might require soldering.
- Hacksaw: Use it to cut any necessary brackets or supports.
- Wrenches: Helpful during the assembly process to tighten fittings and connections.
- Tubing: Depending on the filter system, you may need additional tubing for connections.
- Mounting bracket: To secure the filter system to a wall or other support structure.
- Box knife: Useful for opening packaging and cutting any small items.
Remember to work safely, follow installation instructions carefully and ensure you have tested your water before making any filter choices. Good luck with your DIY whole house water filter project!
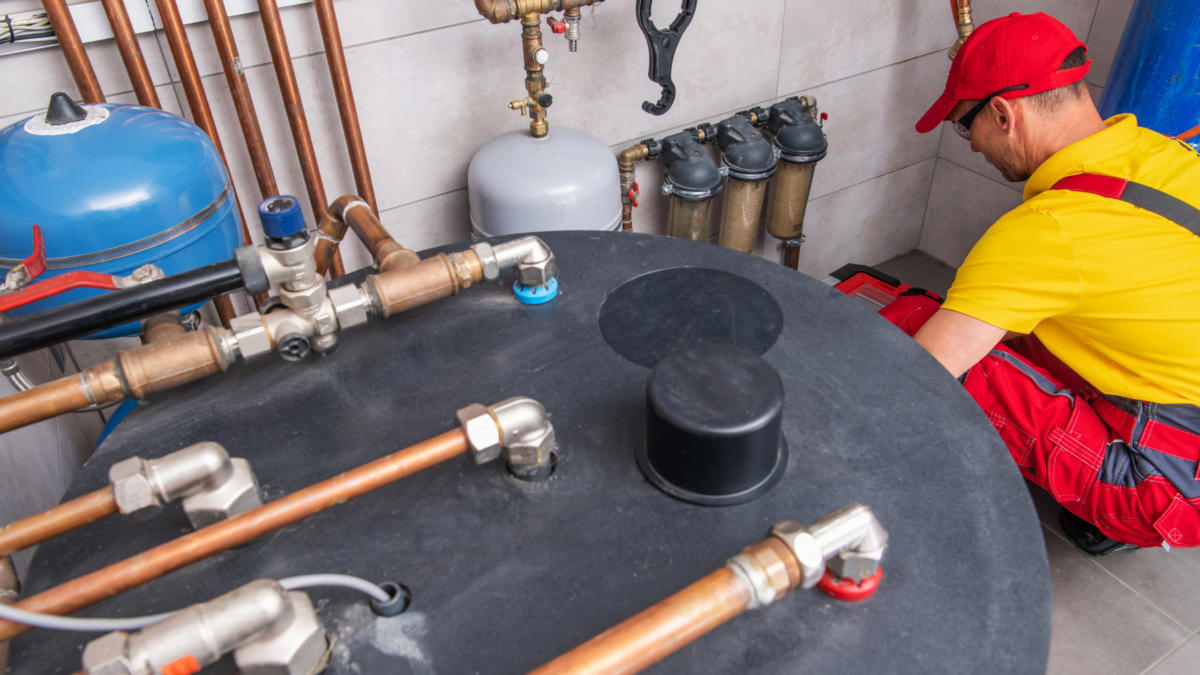
Building the DIY Whole House Water Filter
Preparing the Installation Site
Before starting your DIY whole house water filter project, it’s crucial to select an appropriate location for installation. Ensure that the installation site has enough space, is easily accessible, and close to your home’s main water supply line. You’ll need some basic plumbing skills and tools such as a drill, wrenches, and a bucket to collect any water that may spill during the process.
Remember, safety comes first when working with plumbing fixtures. Turn off the main water supply and release pressure from the water lines before beginning work. Ensure proper ventilation in the area, and wear gloves and eye protection when necessary.
Assembling the Filter System
Now it’s time to assemble your DIY water filter system. Based on your water test results, choose the appropriate filter types to remove contaminants in your water. Common filter types include sediment filters, activated carbon filters, and reverse osmosis filters. You may need a combination of these filters to effectively purify your water.
To assemble the system:
- Connect the filters in sequence according to the manufacturer’s instructions.
- Attach the inlet and outlet ports to the first and last filters in the series, respectively.
- Secure the filters to a mounting bracket.
- Add any additional accessories, such as pressure gauges or valves, if applicable.
Installing the Plumbing Connections
After your filter system is assembled, it’s time to make the plumbing connections:
- Use the drill to make holes for the mounting bracket in the installation site.
- Fasten the filter assembly to the wall with the provided screws and anchor bolts.
- Cut the main water supply line and install a shut-off valve on both sides of the cut.
- Connect the inlet and outlet ports of the filter system to the corresponding shut-off valves using appropriate fittings and pipes.
Testing for Leaks
Once all connections are in place, it’s crucial to check for leaks. Slowly turn on the water supply and inspect each joint for any signs of water leakage. Tighten up any loose connections to prevent leaks. Finally, open the shut-off valves and check the filtered water flow for proper functioning.
Remember to maintain your DIY whole house water filter system by changing the filters according to manufacturer guidelines to ensure optimal performance and water quality.
Alternative DIY Water Filter Options
In this section, we will explore some alternative DIY water filter options for your whole house filtration system, including homemade water filter systems and adding UV light filters to your existing system.
Homemade Water Filter Systems
Homemade water filter systems can be a cost-effective and environmentally friendly way to ensure clean water for your entire home. One simple method involves using a clear plastic bottle, diatomaceous earth, a coffee filter, and non-toxic glue.
To create this DIY water filter, follow these steps:
- Cut off the bottom of the plastic bottle, creating an opening large enough to insert the filtration materials.
- Place the bottle upside down with the neck into a tall glass. This is the container where the clean water will filter into.
- Layer the bottle with gravel or coarser filtration material at the bottom, followed by finer materials like the diatomaceous earth and coffee filter on top.
Some other materials you may consider using in your homemade water filter system include:
- Activated charcoal
- Sand
- Cotton or cloth
Remember to replace these filtration materials regularly to maintain the efficiency of your filter.
Adding UV Light Filters to Filtration System
To further enhance the performance of your DIY whole house water filter system, consider incorporating a UV light filter. Ultraviolet (UV) light filters kill bacteria, viruses, and other microorganisms that may be present in your municipal water.
Here are some key benefits of adding a UV light filter to your system:
- Chemical-free water treatment
- Environmentally friendly
- Low maintenance
To add a UV light filter, follow these general steps:
- Choose a suitable location for the UV filter in your existing filtration system, preferably after the other filter stages.
- Install the UV chamber according to the manufacturer’s instructions.
- Connect the UV lamp to an electrical outlet, ensuring it is securely fastened and remains dry.
- Maintain the UV lamp by cleaning the outer surface of the quartz sleeve and replacing the bulb as per the manufacturer’s recommendations.
By exploring these alternative DIY water filter options and customizing your filtration setup, you can create an efficient and environmentally conscious water purification system tailored to your specific needs. Remember to always consult your local water quality guidelines and seek professional advice when necessary.
Maintenance and Troubleshooting
Regular Filter Maintenance
Maintaining a DIY whole house water filter system is crucial for optimal performance and longevity. Here are some tips for regular filter maintenance:
- Inspect and replace filter cartridges: Regularly check the filter cartridges for wear and tear or clogging. Replace filter cartridges as per the manufacturer’s recommendations. This ensures contaminants such as sediment, iron, manganese, and chlorine are effectively removed.
- Clean filter housing: Periodically disassemble the filter housing and give it a thorough cleaning to remove any accumulated dirt or debris. This helps prevent leaks and ensures smooth operation.
- Test water quality: Perform water testing regularly to ensure that the filter system is effectively removing contaminants like sediment, iron, manganese, chlorine, and bacteria. Adjust the filter media, activated carbon, or sediment pre-filter as needed based on the testing results.
Dealing with Common Issues
In the event of issues with your DIY whole house water filter system, follow these steps for troubleshooting:
- Trapped air: If the water flow is inconsistent or there are noises in the system, it may be due to trapped air. To resolve this, flush the system by turning on the faucet to full and letting it run for a few minutes. This should eliminate the trapped air and restore consistent water flow.
- Leaking filter: Check the filter housing, shut-off valves, and connections for any leaks. Ensure that all components are correctly assembled and tightly secured. Replace any damaged parts if necessary.
- Reduced water pressure: If the water pressure has significantly dropped, it could be caused by a clogged filter cartridge. Replace the filter cartridge and see if the issue is resolved.
By regularly maintaining your DIY whole house water filter system and troubleshooting common issues, you can ensure your system operates at peak efficiency, providing clean, safe water for your entire household.
Advantages and Disadvantages of DIY Whole House Water Filters
Pros of DIY Whole House Water Filters
- Cost savings: Building a DIY whole house water filter can be significantly cheaper than buying a complete system from a company. The money saved from not purchasing expensive systems can be put towards other household expenses.
- Performance: If a DIY water filter is built correctly, it can deliver the same performance level as commercially available systems. This means effectively removing contaminants from your water supply.
- Flexibility: DIY water filters allow you to tailor the filtration media to your specific needs, ensuring that the system effectively targets the known contaminants present in your water. Additionally, DIY filters offer the flexibility to use different filtration media depending on your budget and preferences, such as carbon filters for chlorine removal or sediment filters for dirt.
- Compatibility: A homemade water filter can be customized to work with your existing plumbing fixtures, ensuring seamless integration without the need for costly modifications. This also allows you to maintain a consistent aesthetic throughout your home.
Cons of DIY Whole House Water Filters
- Safety concerns: Without the proper knowledge or experience, creating a DIY filtration system may result in unintended consequences or hazards, such as leaks or water contamination. It’s essential to carefully research and follow safety guidelines when building your filtration system.
- Limited filtration: Although DIY whole-house filters can be customized with various filtration media, they may not be as comprehensive as commercial filters designed to remove a wide array of contaminants. This limitation could require additional filters for optimal water quality.
- Maintenance and longevity: DIY water filters may not be as durable or long-lasting as commercial systems, which are often built with high-quality materials and components. Additionally, maintaining a homemade filter may prove more challenging than that of a professionally installed system, requiring more frequent cleaning or replacing of components.
- No warranty or support: If an issue arises with your DIY water filter, troubleshooting, and fixing any problems could become challenging without the professional support and warranty provided by commercial brands.
While there are both pros and cons to creating a DIY whole house water filter, it’s crucial to weigh these factors carefully and decide if a homemade filter is a suitable choice for your home and water needs.